Razorpay
Connect Razorpay to accept subscription payments and article unlock payments from your readers.
OnePaywall uses Razorpay to process reader payments — subscriptions, article unlocks, and digital product purchases. You need a Razorpay account with your own API keys.
Step 1 — Create a Razorpay account
If you don't have one, sign up at razorpay.com. Business verification is required to accept live payments (typically takes 1–3 business days).
Step 2 — Get your API keys
- Log in to the Razorpay Dashboard
- Go to Settings → API Keys
- Click Generate Test Key (for testing) or Generate Live Key (for production)
- You'll see:
- Key ID — starts with
rzp_test_(test) orrzp_live_(production) - Key Secret — shown once; copy it immediately
- Key ID — starts with
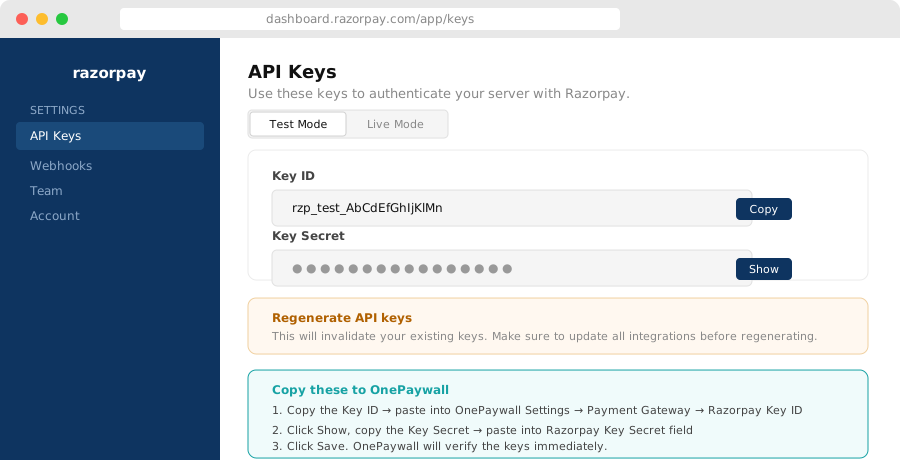
Keep your Key Secret private — never share it or commit it to source code.
Step 3 — Add keys to OnePaywall
- Go to Dashboard → Settings → Payment Gateway
- Select Razorpay
- Paste your Key ID and Key Secret
- Choose the mode: Test or Live
- Click Save
OnePaywall encrypts your credentials at rest. They are never exposed to readers.
Step 4 — Test a payment
With test mode enabled:
- Create a subscription plan (see Pricing)
- Create a gate with a Subscription step
- Visit a gated URL in your browser
- Complete a payment using Razorpay's test card:
4111 1111 1111 1111, any future expiry, any CVV
The test payment should succeed and grant access to the gated content.
Switching to live mode
Once you've tested successfully:
- Generate live API keys from the Razorpay Dashboard
- Replace the test keys in OnePaywall → Settings → Payment Gateway
- Switch the mode from Test to Live
Webhooks (Razorpay → OnePaywall)
OnePaywall automatically configures the Razorpay webhook endpoint when you save your credentials. This allows subscription renewals, cancellations, and payment failures to be processed automatically.
You don't need to manually configure Razorpay webhooks unless you reset your credentials.